Extensions & Add-ins
Your Citations,
Right Where You Write.
The CiteGeist add-in for Microsoft Word is live.
Overleaf and Google Docs extensions are coming very soon! We’ll post full setup guides here as they launch.
 Word — Live
 Overleaf — Soon
 Google Docs — Soon


Microsoft Word
Microsoft Word add-in
The CiteGeist add-in for Word keeps your reference library one click away so you can search, cite, and maintain a clean bibliography without leaving your document. About the add-in & privacy →
1. Adding the Extension
There are two ways to get CiteGeist into Word. Pick whichever suits you — both end in the same place: the CiteGeist panel open alongside your document, ready to search and insert citations.
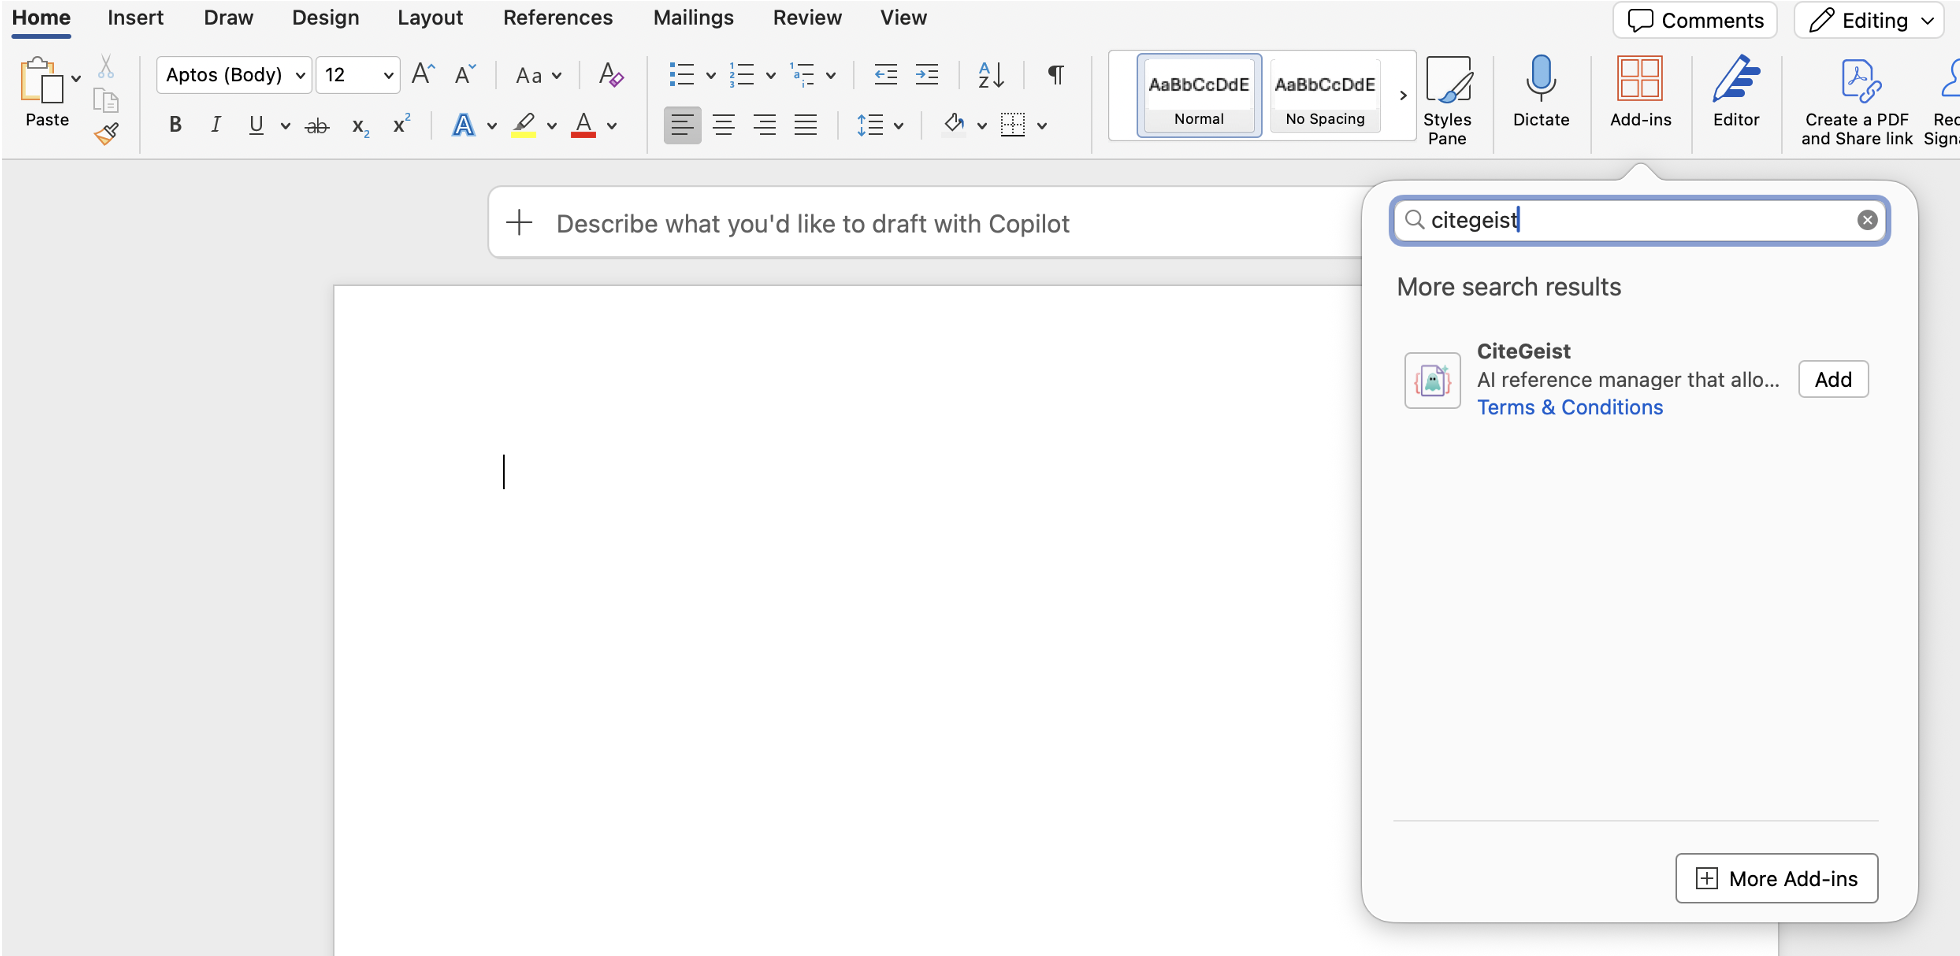
Add the Add-in
From Word’s Add-ins menu, search for CiteGeist and select it to install the task pane.
Before you start
- Microsoft Word is installed.
- Word has been opened at least once on this Mac.
- Your Mac is connected to the internet.
1. Download the Helper App
Download the CiteGeist Word Add-In helper app for your Mac.

2. Open the Helper App
- If you received it as a
.zipfile, double-click the zip to unpack it. - Put the helper app anywhere you like (Desktop, Downloads, Applications). There is nothing to install.
- Double-click the helper app to open it.
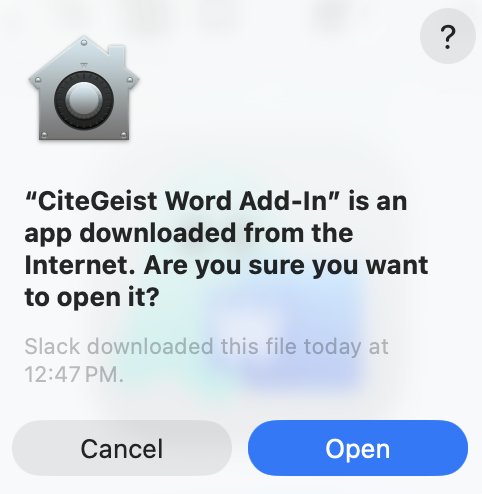
- macOS asks whether you’re sure you want to open an app downloaded from the Internet. Click Open.
3. Allow It the First Time
The first time on each Mac, macOS may refuse to open the helper app because it comes from an “unidentified developer”. To allow it (once):
- Try to open the helper app (it gets blocked).
- Open .
- Scroll down to Security and click Open Anyway for the helper app. This button only appears for a short while after the blocked attempt.
- Enter your Mac password if asked, then click Open.
After that, the helper app opens normally.
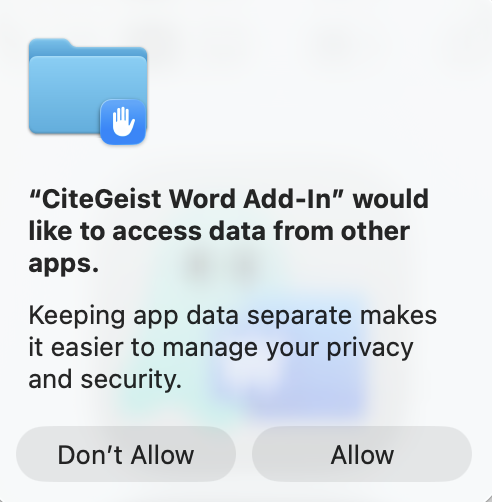
3.5 macOS may also ask whether the helper app “would like to access data from other apps”. Click Allow: the helper app needs to look in Word’s add-in folder to see whether the Add-In is installed. This question may appear each time the helper app opens.
4. Check Your System
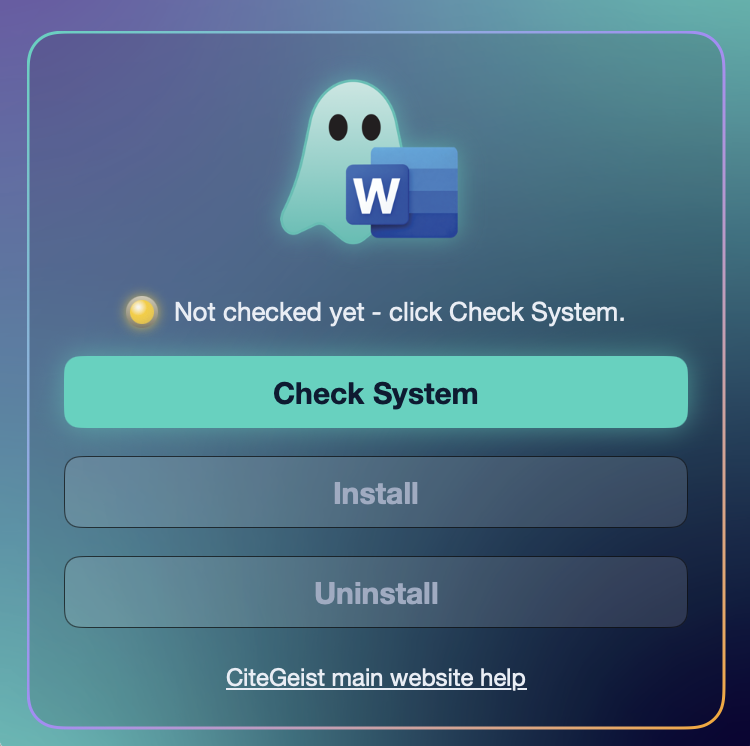
The status light under the logo shows where things stand. It’s yellow until you click Check System and while a task runs, then turns green or red with a short message. Click the light or its message for more detail. Checking changes nothing on your Mac. Follow 4.1–4.3 below.
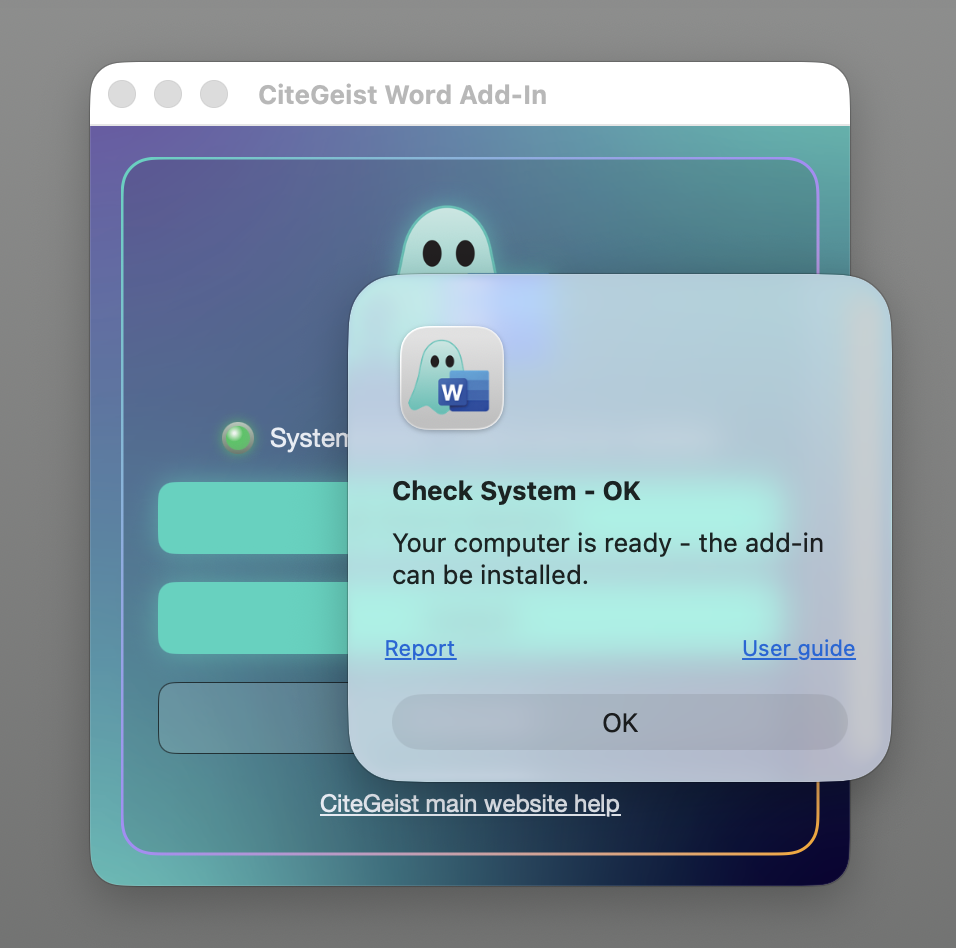
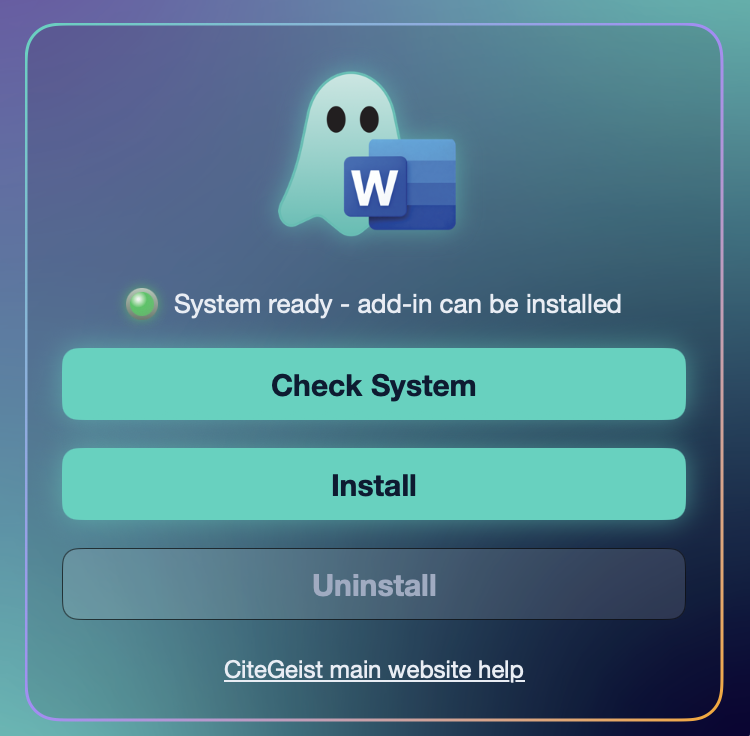
[FAIL] (see “If Check System is red” below), then click Check System again.5. Install the Add-In
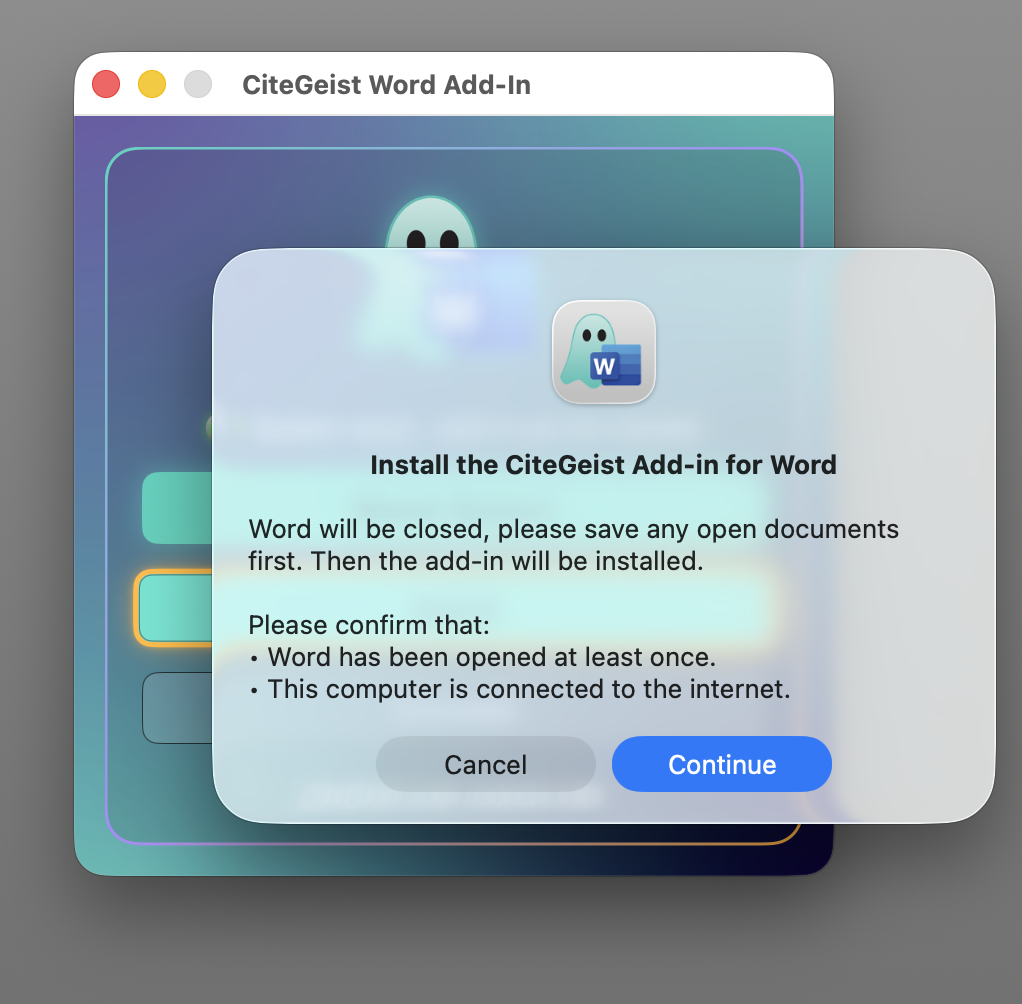
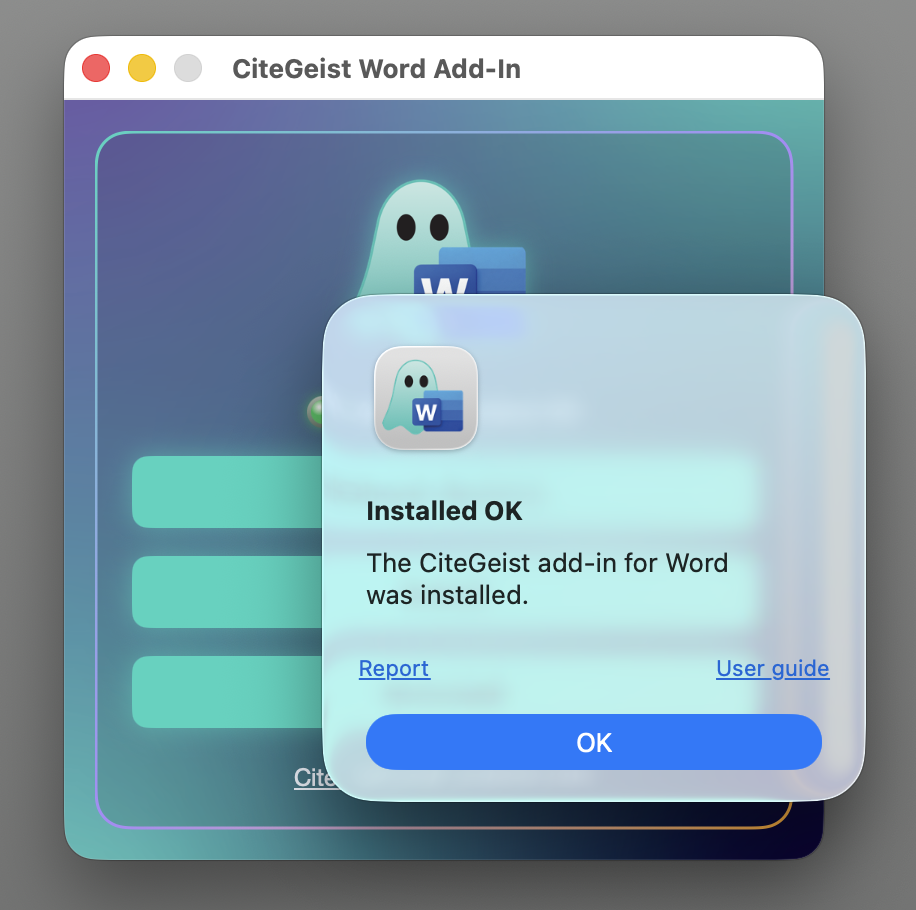
Save any open Word documents first: Word will be closed during the install, and any earlier copy of the Add-In is replaced with a fresh one. Then follow 5.1–5.4 below.
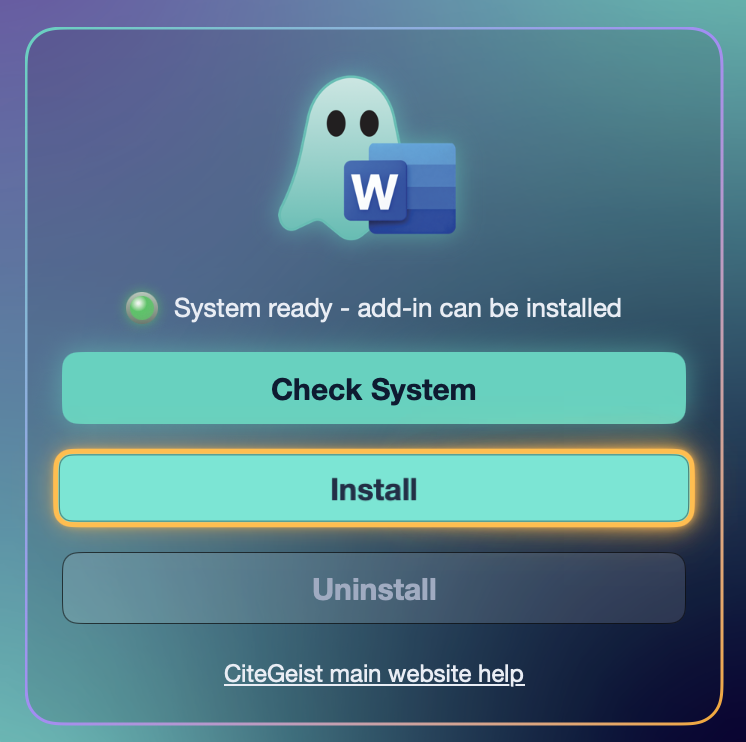
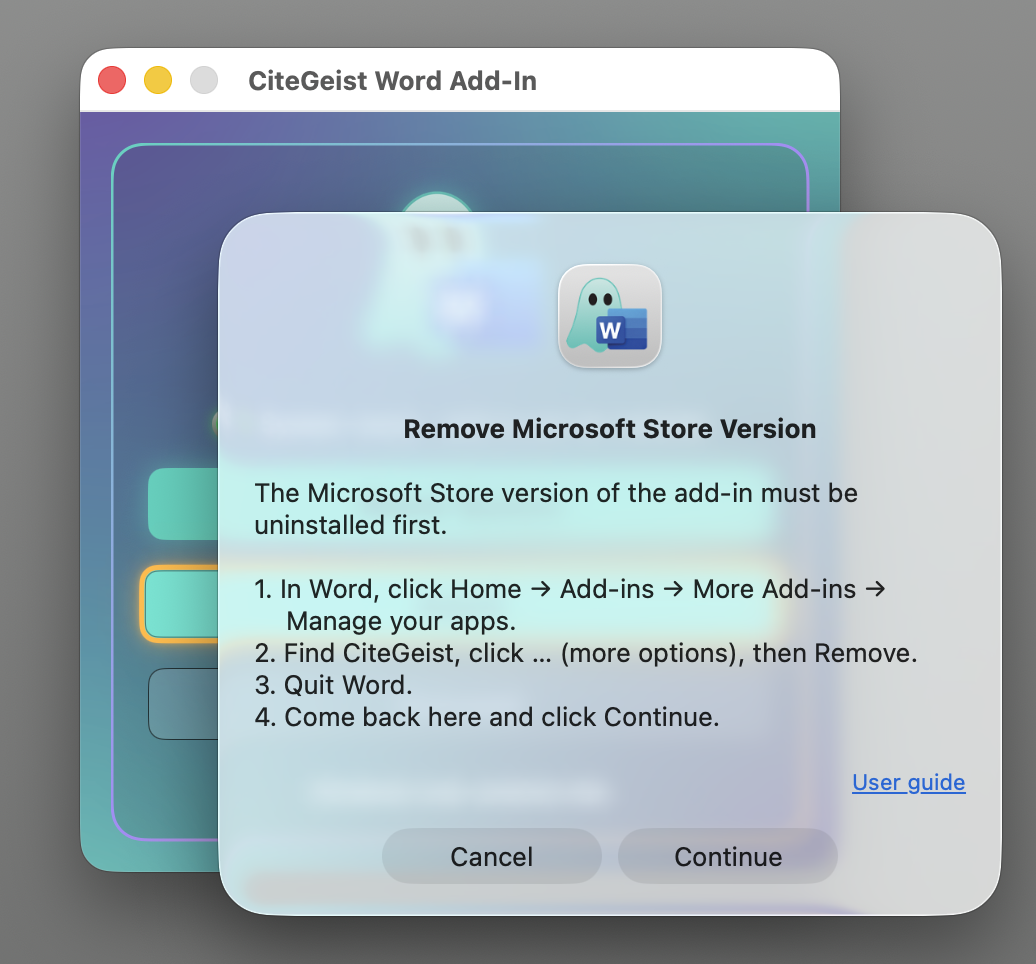
6. Turn On the Add-In in Word
- Open Word and open a document.
- Each time Word starts, turn the Add-In on once:
- From then on, until you quit Word, open the Add-In with the CiteGeist button on the References tab, in new documents too.
- Sign in to CiteGeist in the Add-In as usual.
Troubleshooting & more
If Check System is red
Click Report in the message and look for lines starting with [FAIL]. The most common ones:
- Microsoft Word not found
- Install Word first.
- Word has never been opened here
- Open Word, quit it again, then click Check System again.
- Cannot reach (servers)
- Check the internet connection, or ask IT whether the network blocks it.
- Word add-ins are switched off by IT policy
- Ask your IT department to deploy the Add-In for you.
Anything else: send the Report text to Support (see “Help and support” below).
Uninstalling the Add-In
Uninstall is available once Check System is green and an Add-In installed by the helper app is found. After a message explaining what will happen, Word is closed and the Add-In is removed. The helper app never removes a copy from the Microsoft Store; you do that yourself in Word.
If the Add-In disappears later
Clearing Office’s cache, or some Office updates, can remove it. Just open the helper app and click Install again.
Moving to the Microsoft Store or IT version later
First click Uninstall in the helper app. Then install the Add-In from the Store, or let your IT department deploy it.
Logs
Each task is saved in ~/Library/Logs/CiteGeist/ (replaced each time). If something goes wrong, send that file, or the copied report, to Support.
Removing the helper app
Drag it to the Trash. Only its log files remain, in the folder above. Removing the helper app doesn’t remove the Add-In from Word, so click Uninstall first if you want that too.
Help and support
Help with the Add-In in Word is right here on this page (also linked at the bottom of the helper app’s window). You can contact Support at support@citegeist.io. If something went wrong, include the Report text or the log file.
2. First Run
Once CiteGeist is installed, whichever option you chose, here’s what happens the first time you open it.
1. First Run
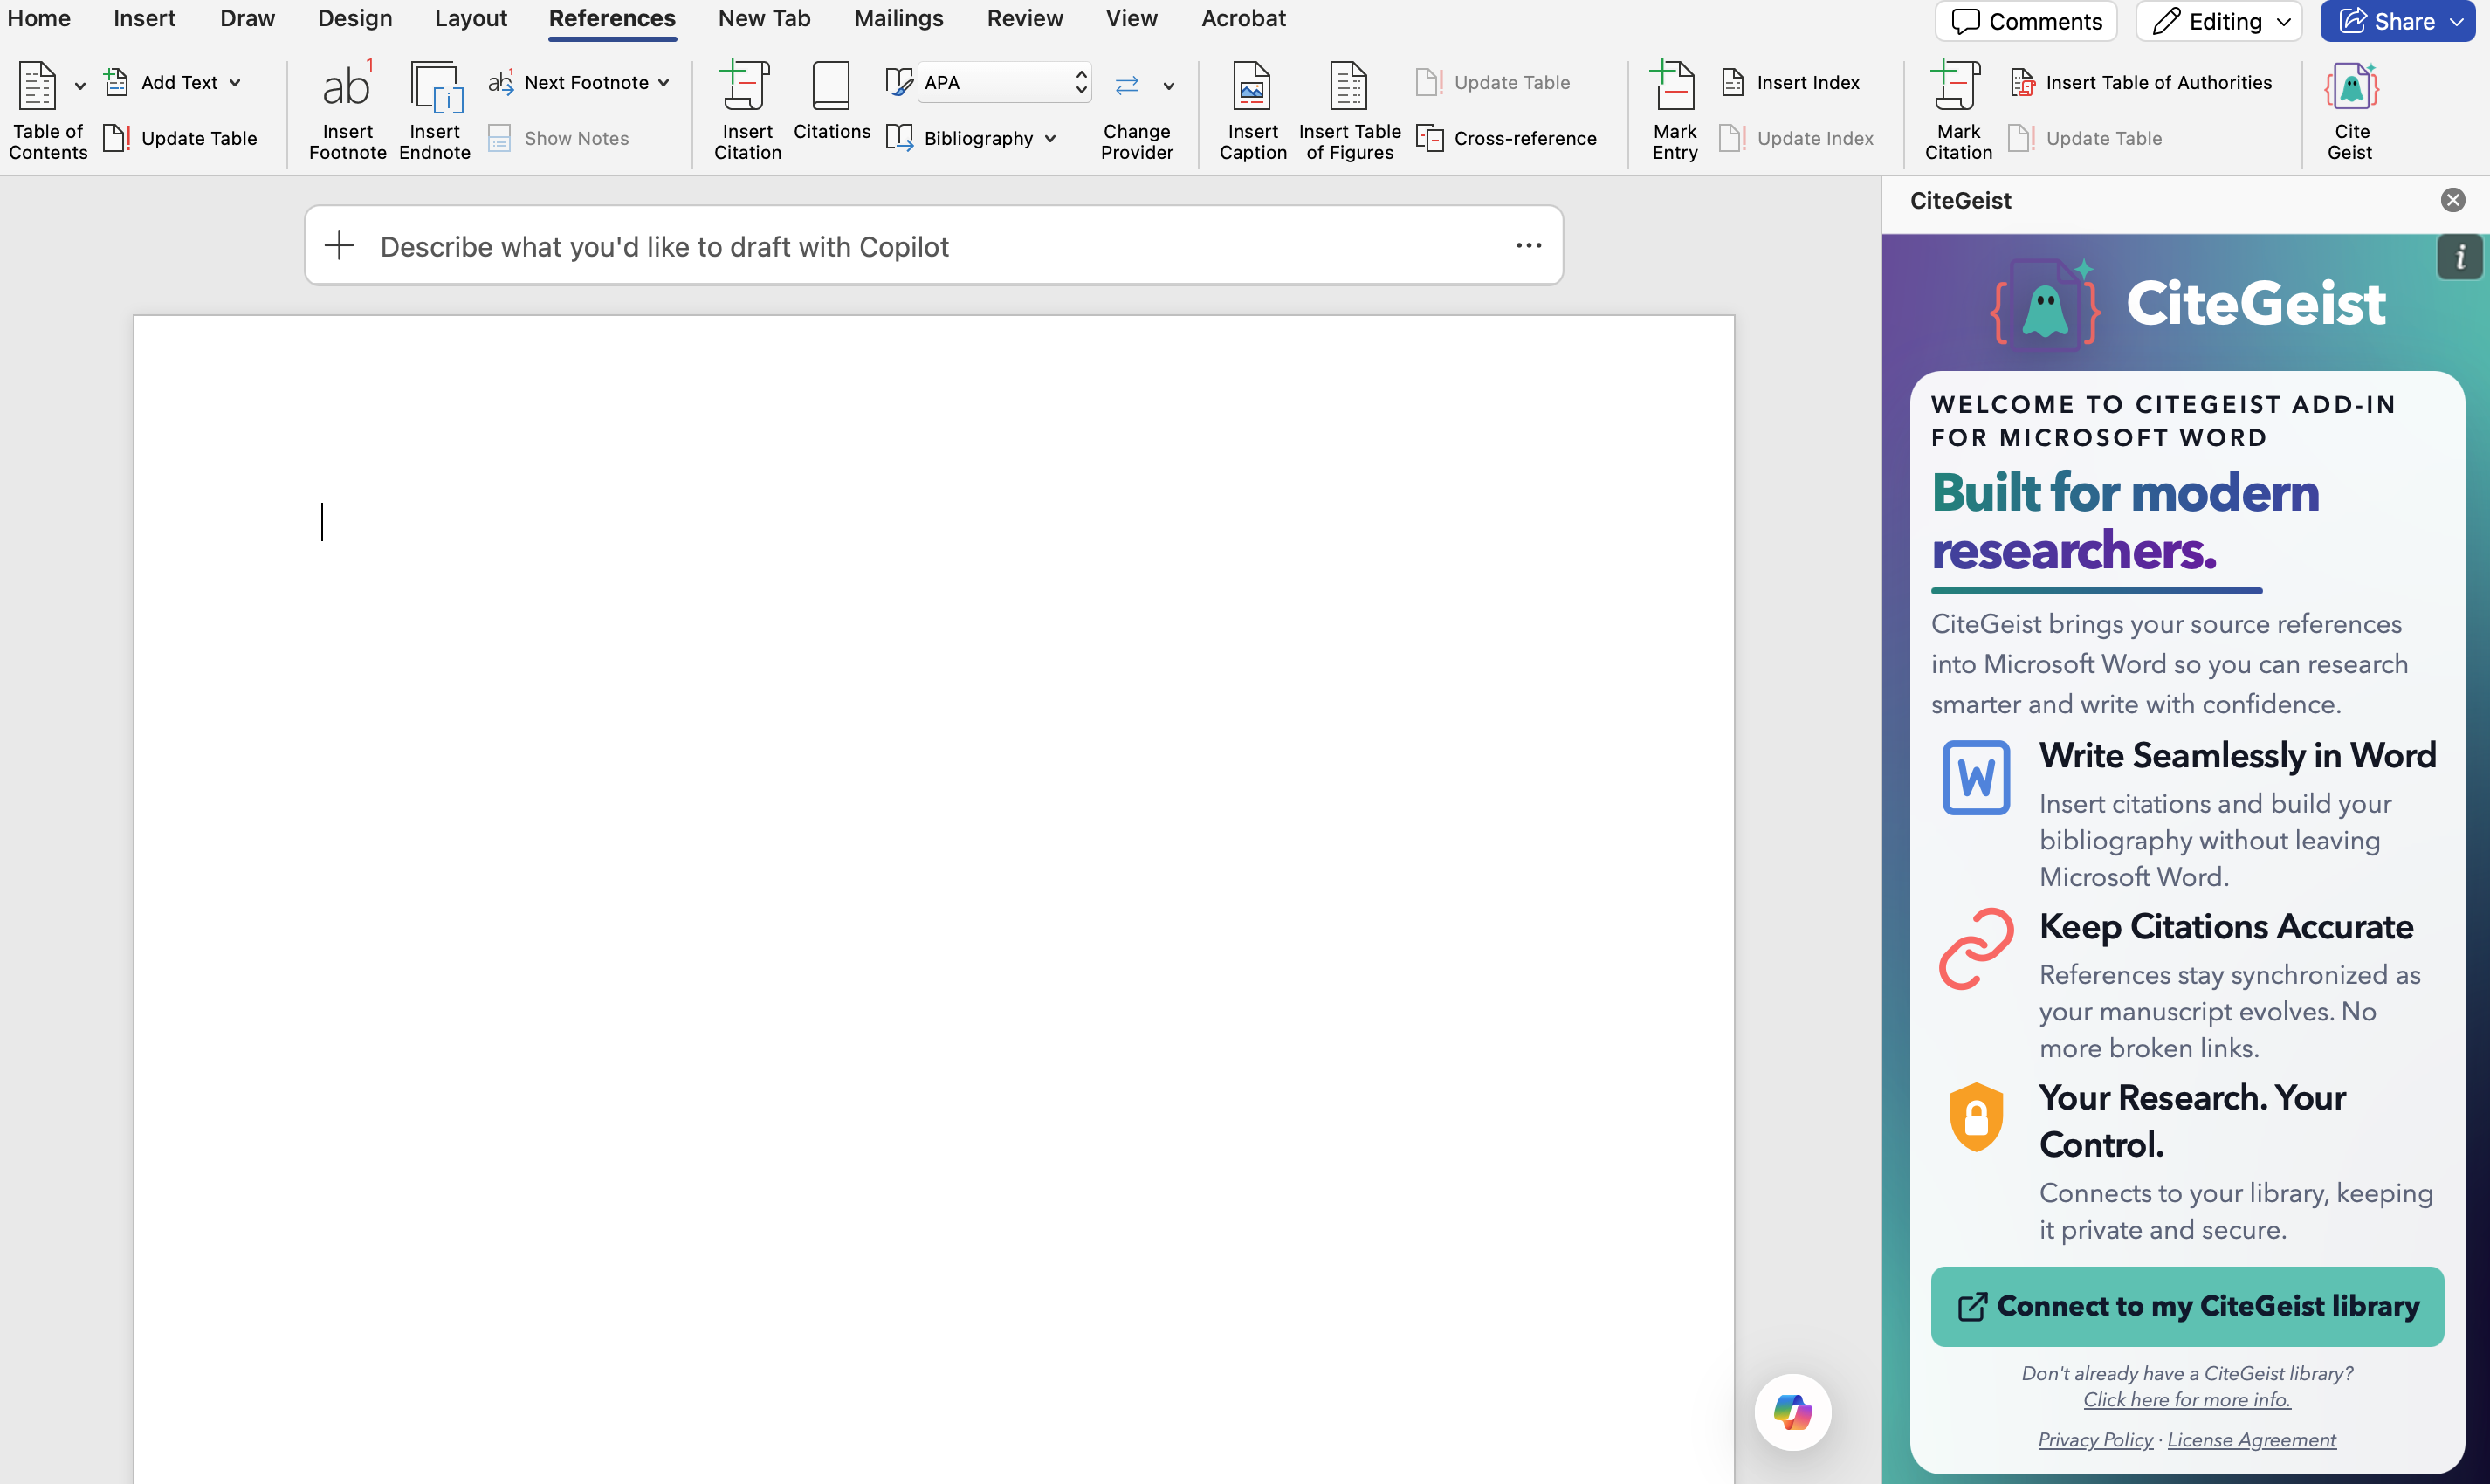
On first launch, Word opens the CiteGeist task pane so you can continue setup.
2. Sign In
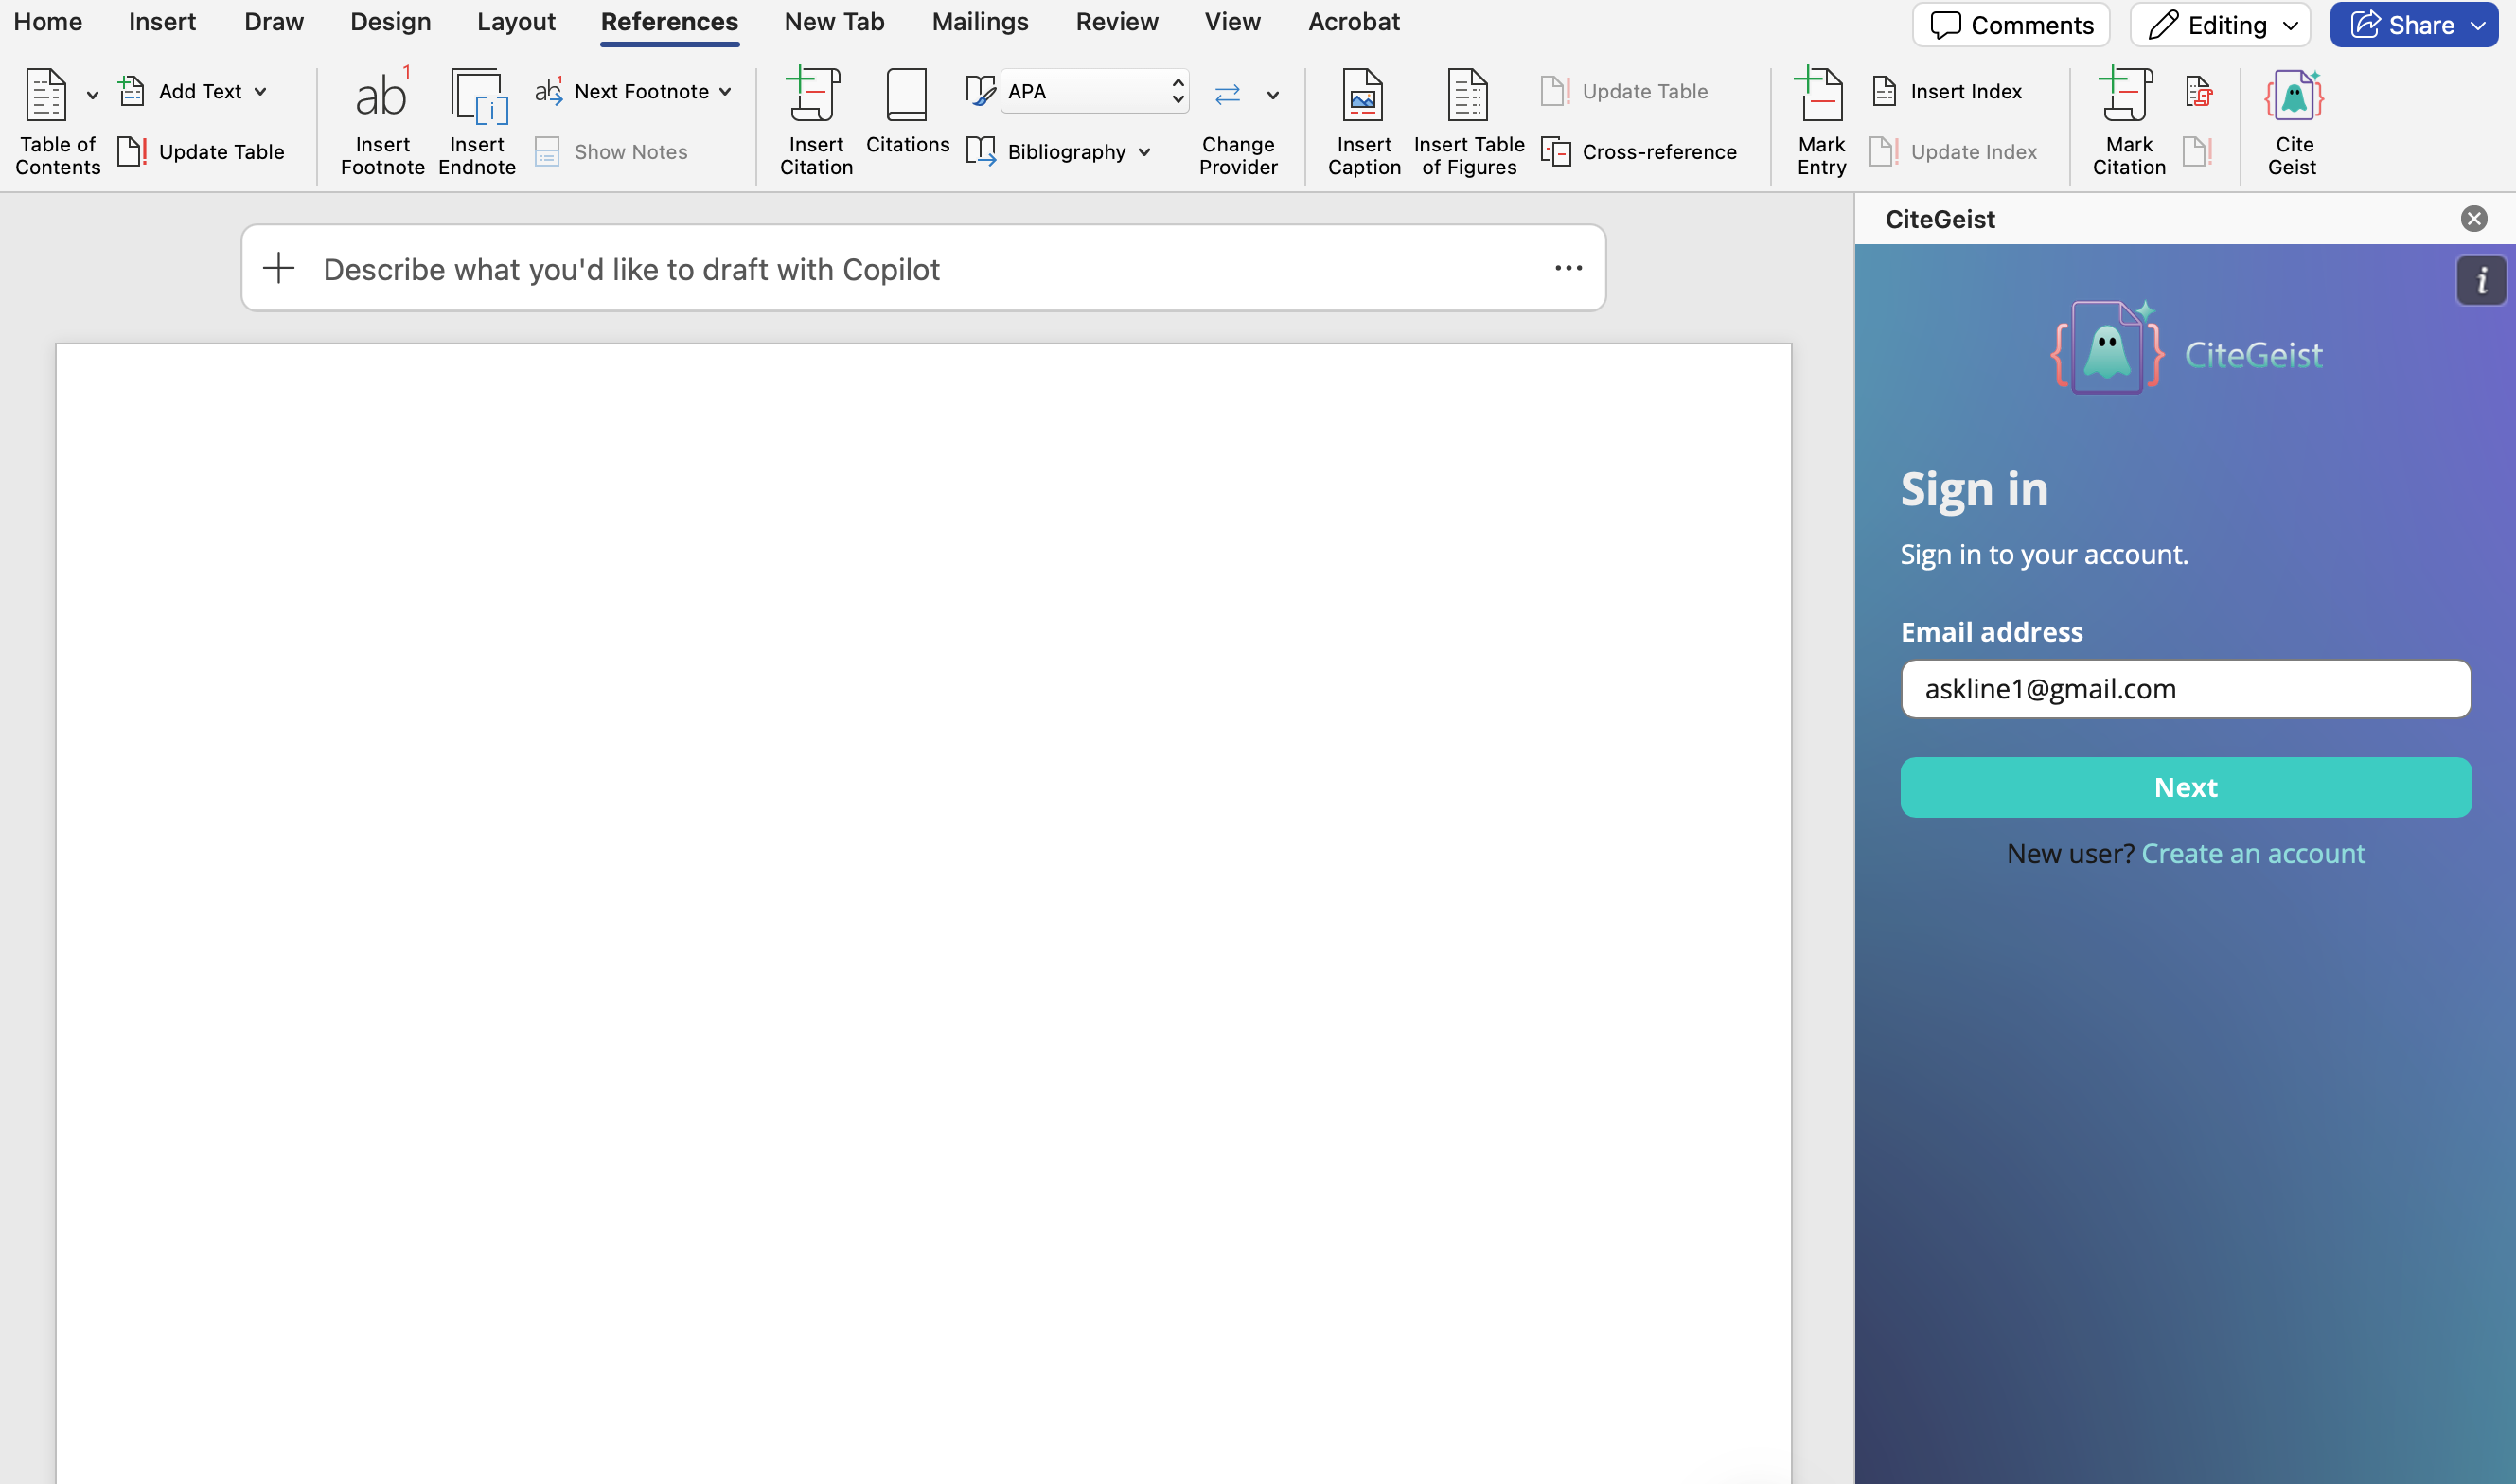
Sign in with your CiteGeist account to connect your reference library to the add-in.
3. Start Citing
The CiteGeist panel opens in the task pane, ready to search and insert citations.
3. Interface Overview
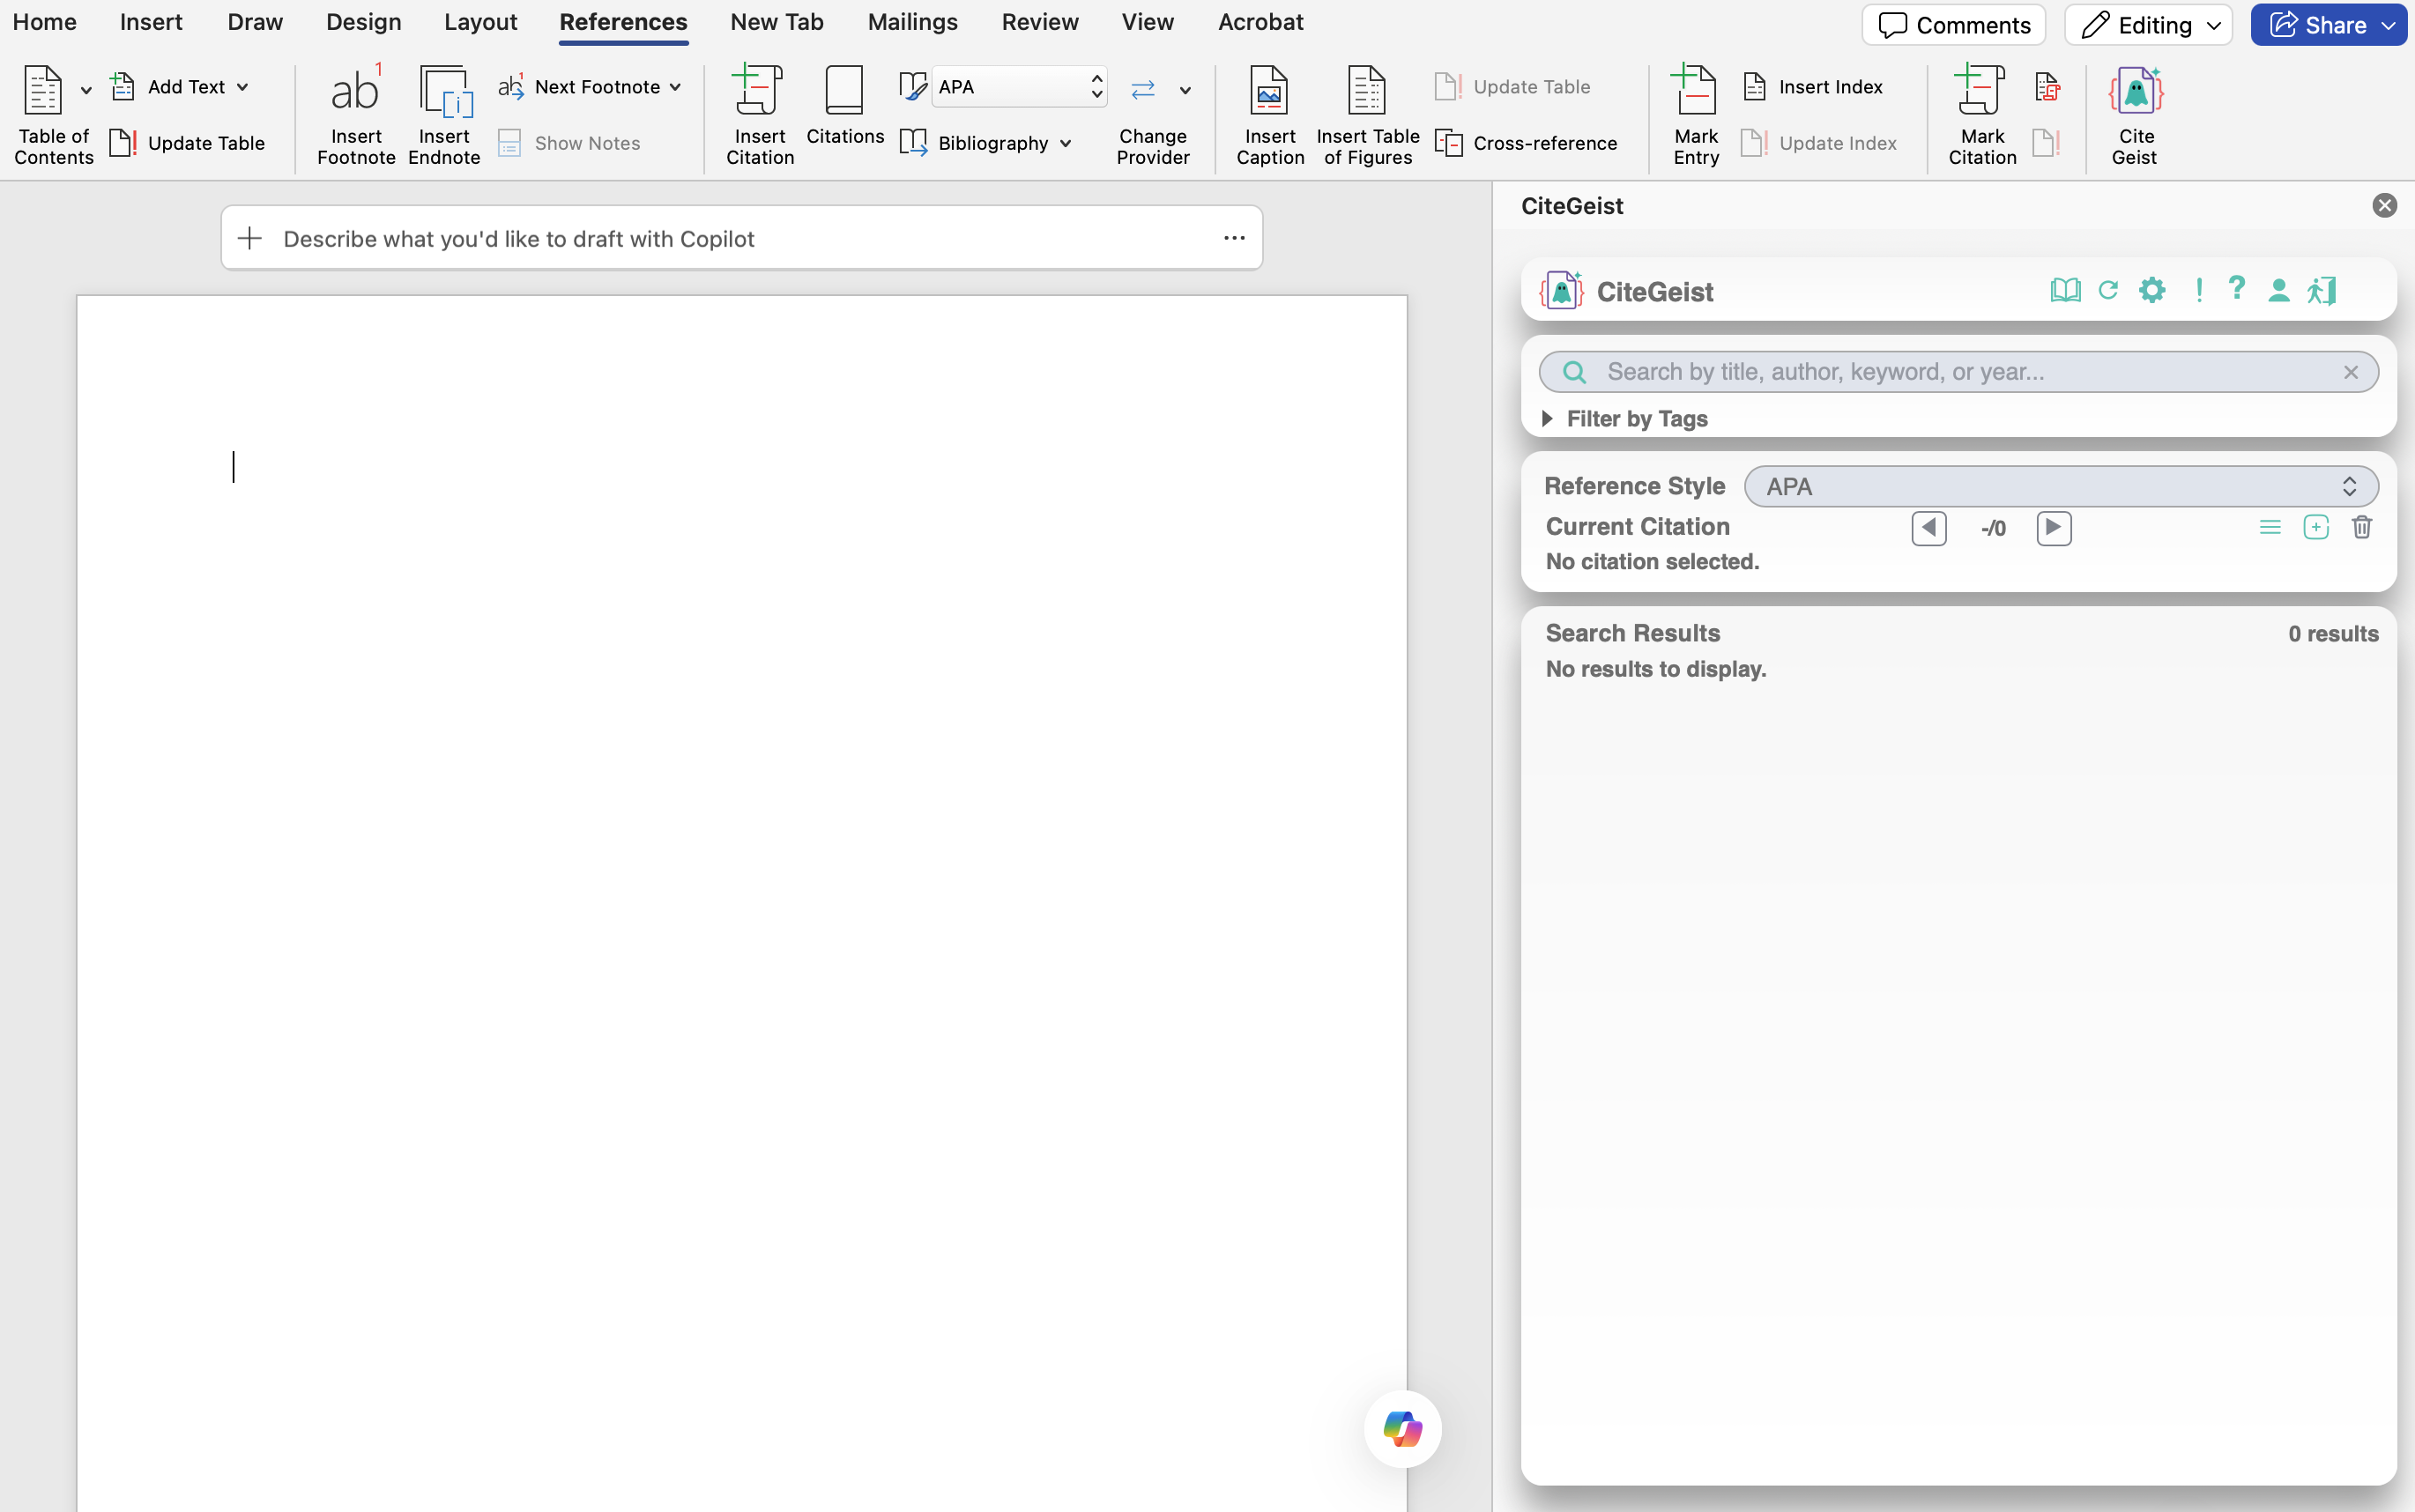
CiteGeist in Word is arranged as four stacked panels: 1Title Panel, 2Search Panel, 3Current Citation Panel, and 4Search Results.
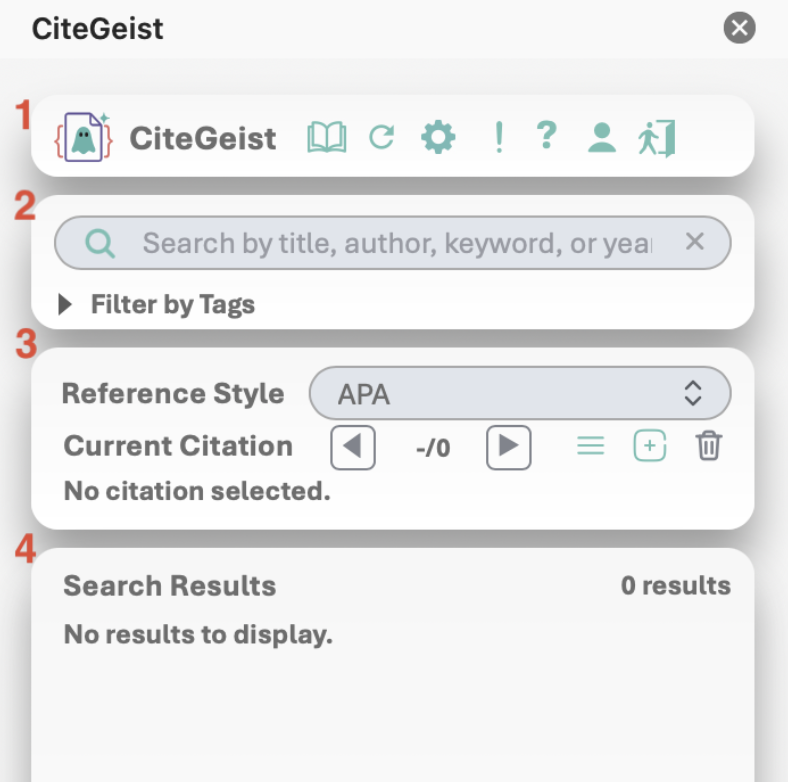
Title Panel

Bibliography vs. Refresh — Bibliography performs the full reference-list update; Refresh is the quicker citation-display update. Citations are resolved against the signed-in account’s library.
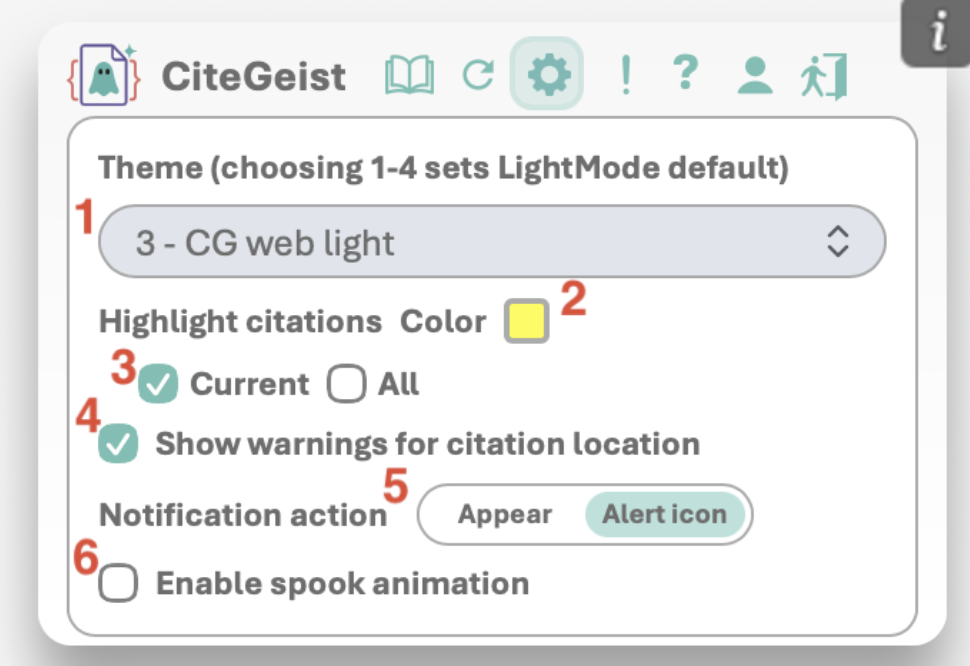
Control Panel
Notifications
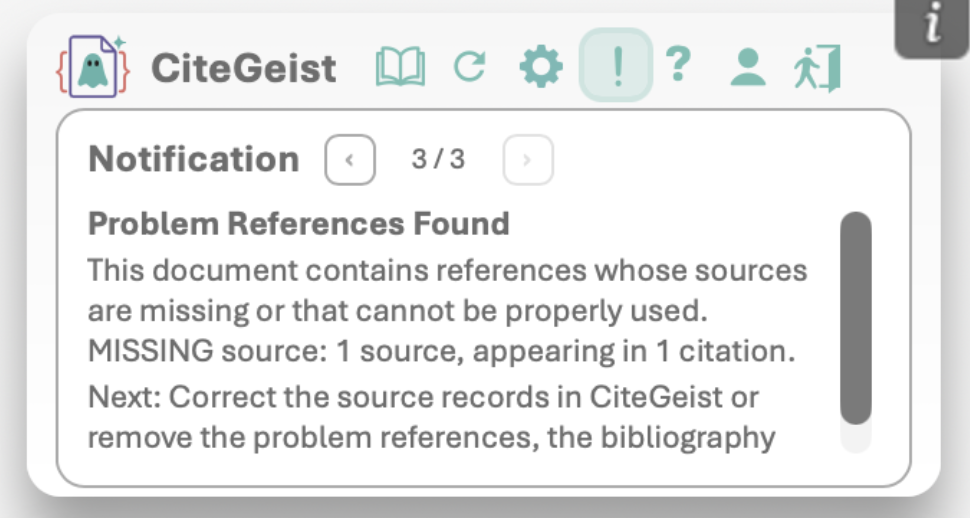
Use Previous and Next when multiple notices are available. Dismiss with Esc or by selecting Notification again.
User Information
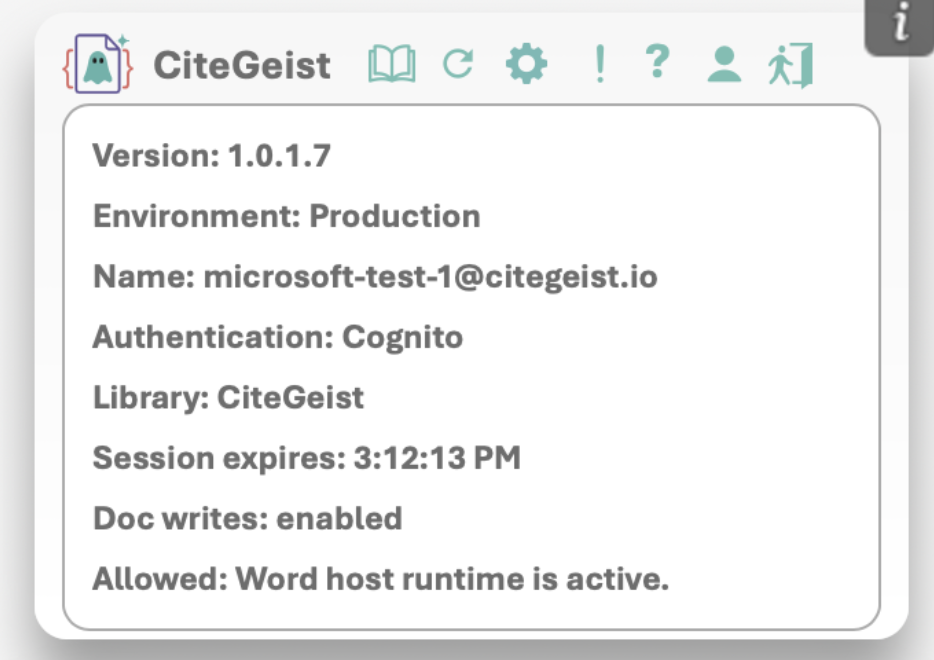
Shows version, environment, signed-in account, active library, approximate session expiration, and Word-host status.
4. Finding References
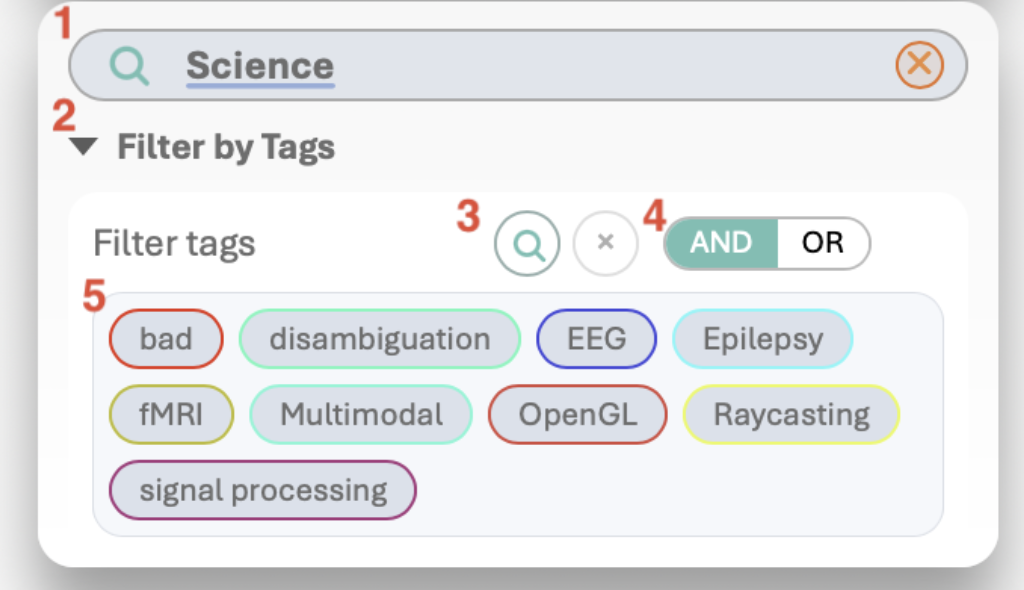
The Search Panel and Search Results work together. Enter text in the 1search field or select tags under 2Filter by Tags, then review matching references below.
Search Panel
Start with distinctive terms rather than long natural-language queries. Add a year when titles or authors are similar. Switch from AND to OR to broaden results quickly.
Search Results
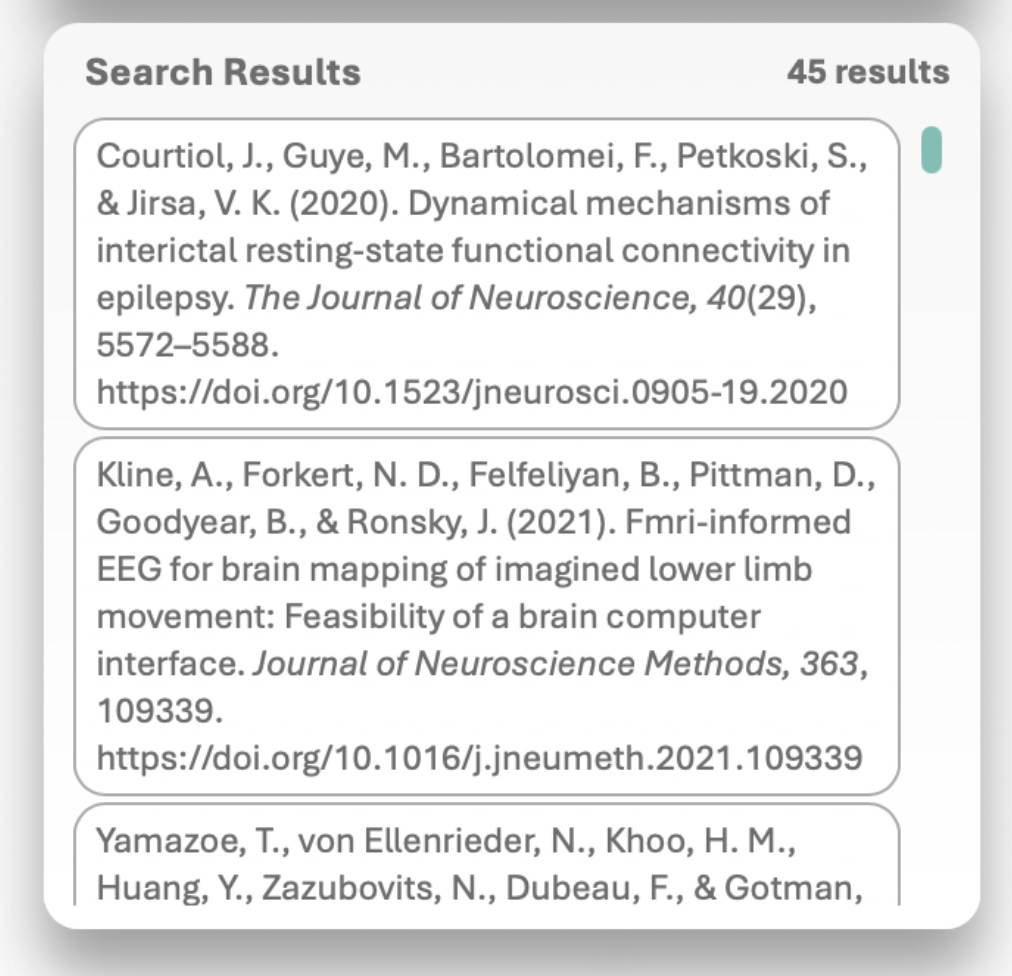
Results list references that match the current text query, tag filters, or both.
5. Current Citation Panel
The Current Citation Panel activates when your Word cursor is inside a CiteGeist citation and lists each reference currently included.
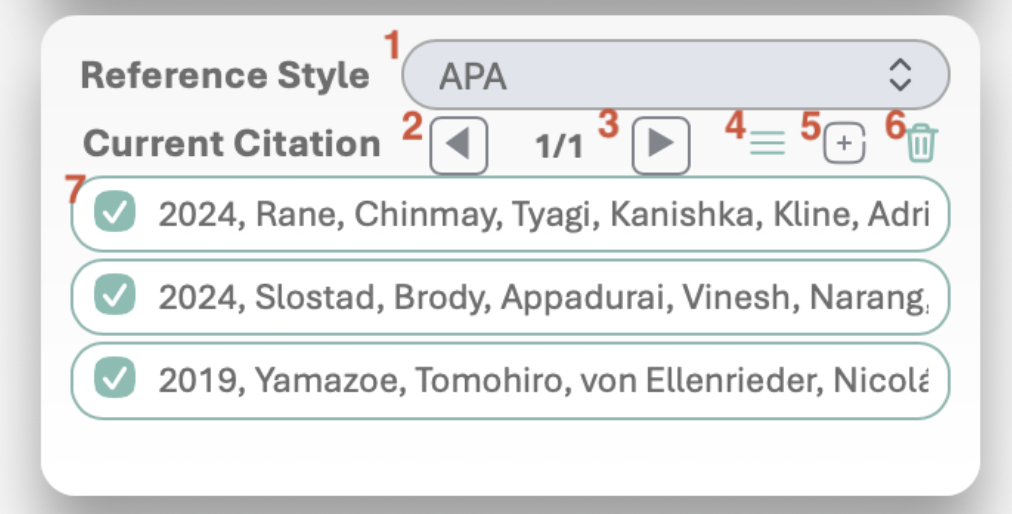
Some document-wide effects finalize only after moving the Word cursor outside the citation. Regenerate Bibliography after source additions or removals when the reference list needs updating.
Create a citation
Place the cursor, select New Citation, search and select at least one source, then move outside the citation to finalize.
Add or remove a reference
Open the citation, select another source to add, or clear a selected source to remove only that reference.
Delete a citation
Open the citation and select Delete Citation to remove the complete citation entry.
Update bibliography
After adding or removing sources, move outside the citation and select Bibliography.
Dynamic panel sizing
Search, Search Results, and Current Citation share vertical space. Hovering a populated panel gives it more room while others contract. This only changes the task-pane view and does not modify the document.
6. Special Cases
Occasionally, CiteGeist may find that a reference is no longer available or cannot yet be cited reliably. These conditions affect only the marked reference, not the entire document.
MISSING references
INVALID references
MISSING means a formerly available source cannot be retrieved. INVALID means a source can be found but cannot yet produce a dependable citation.
Overleaf
Overleaf extension
A native CiteGeist panel directly inside Overleaf — search your library, pick a style, and drop BibTeX citations into your LaTeX project without switching tabs.
Coming soon!
Extension in development
Google Docs
Google Docs add-on
A Google Workspace add-on that brings your CiteGeist library into the Docs side panel — search, insert, and format references in seconds.
Coming soon!
Extension in development
Have a question about how citing works?